나는 Python공부 등을 할 때 주로 VS code를 사용한다.
여러 익스텐션으로 확장성도 좋으며 제공하는 기능들이 많아 편리한 것 같다.
얼마 전 github을 시작하였는데 VS code을 통해 github에 커밋할 수 있는 간략한 방법을 포스팅해보려고 한다.
준비 조건
VS code 설치
github 가입
git bash 설치
1. 먼저 Git에서 새로운 repository를 생성합니다.

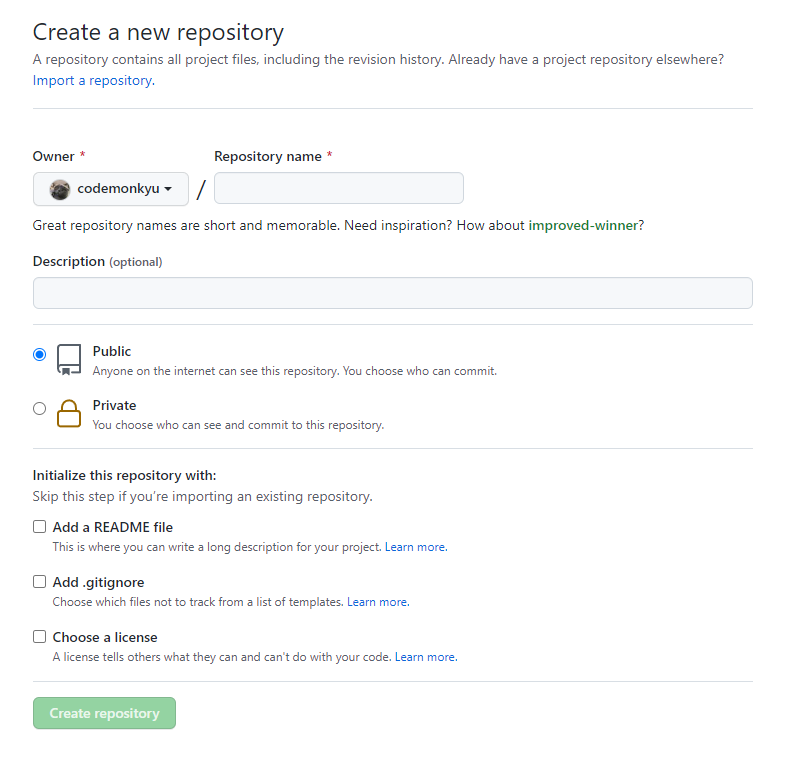
new 버튼을 클릭하면 create a new repository를 할 수 있는 페이지로 넘어간다.
아래 페이지에서 repository name을 설정해주고 하단 create repository를 눌러준다.
2. repository 주소확인
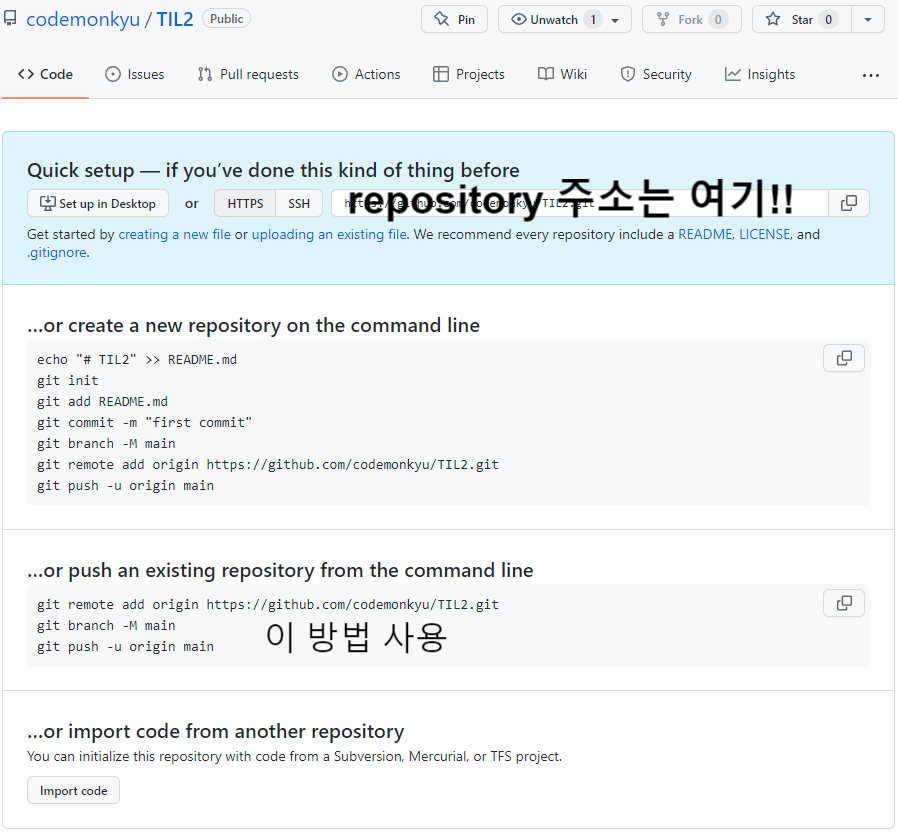
아래와 같은 repository가 생성되고 VScode에서 repository에 연결할 수 있는 방법이 나온다.
나는 2번째 방법을 이용해보겠다.
3. repository에 연결할 폴더와 파일을 만들어보자
(*나는.txt , .py , .md 파일 3가지를 만들어 보았다. 여기서 자유롭게 만들고 싶은 파일을 만들어보자.)

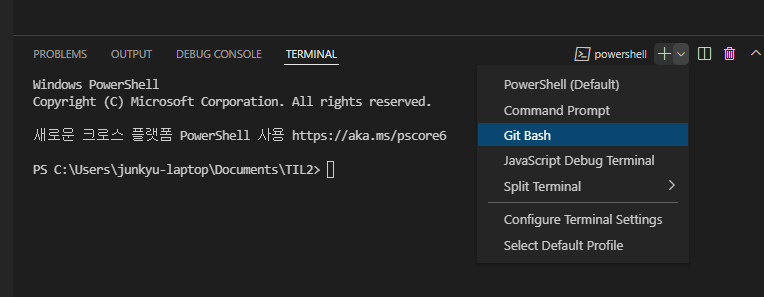
이후 ctrl + ` 를 하여 터미널 창을 열고 입력 프로그램을 git bash로 바꾸어준다.
4. git init!
git bash로 변경한 후 initial repository를 위해 git init을 해준다. 이후 아래 순서대로 파일을 올려보자
junkyu-laptop@codemonkyu MINGW64 ~/Documents/TIL2
$ git init
Initialized empty Git repository in C:/Users/junkyu-laptop/Documents/TIL2/.git/

junkyu-laptop@codemonkyu MINGW64 ~/Documents/TIL2 (master)
$ git remote add origin https://github.com/codemonkyu/TIL2.git
# git remote add origin 본인 repository 주소 붙여넣기

junkyu-laptop@codemonkyu MINGW64 ~/Documents/TIL2 (master)
$ git branch -M main
# master에서 main으로 branch 변경

junkyu-laptop@codemonkyu MINGW64 ~/Documents/TIL2 (main) #branch가 변경된것을 확인
$ git status
On branch main

No commits yet

Untracked files: #untracked files(스테이징되지않은파일)
  (use "git add <file>..." to include in what will be committed)
        README.md
        google.txt
        hello.py

nothing added to commit but untracked files present (use "git add" to track)

junkyu-laptop@codemonkyu MINGW64 ~/Documents/TIL2 (main)
$ git add . #git add . or git add 파일명

junkyu-laptop@codemonkyu MINGW64 ~/Documents/TIL2 (main)
$ git status
On branch main

No commits yet

Changes to be committed:#스테이징 되었다. 상태가 committed로 바뀐걸 확인
  (use "git rm --cached <file>..." to unstage)
        new file:   README.md
        new file:   google.txt
        new file:   hello.py


junkyu-laptop@codemonkyu MINGW64 ~/Documents/TIL2 (main)
$ git commit -m "Create hello.py" #git commit -m "이름" 으로 커밋
[main (root-commit) b628159] Create hello.py
 3 files changed, 7 insertions(+)
 create mode 100644 README.md
 create mode 100644 google.txt
 create mode 100644 hello.py

junkyu-laptop@codemonkyu MINGW64 ~/Documents/TIL2 (main)
$ git push -u origin main
#최종적으로 push를 통해 origin이라는 원격저장소에 나의 로컬저장소를 push해준다
Enumerating objects: 5, done.
Counting objects: 100% (5/5), done.
Delta compression using up to 12 threads
Compressing objects: 100% (3/3), done.
Writing objects: 100% (5/5), 445 bytes | 445.00 KiB/s, done.
Total 5 (delta 0), reused 0 (delta 0), pack-reused 0
To https://github.com/codemonkyu/TIL2.git
 * [new branch]      main -> main
branch 'main' set up to track 'origin/main'.
5. git push origin master
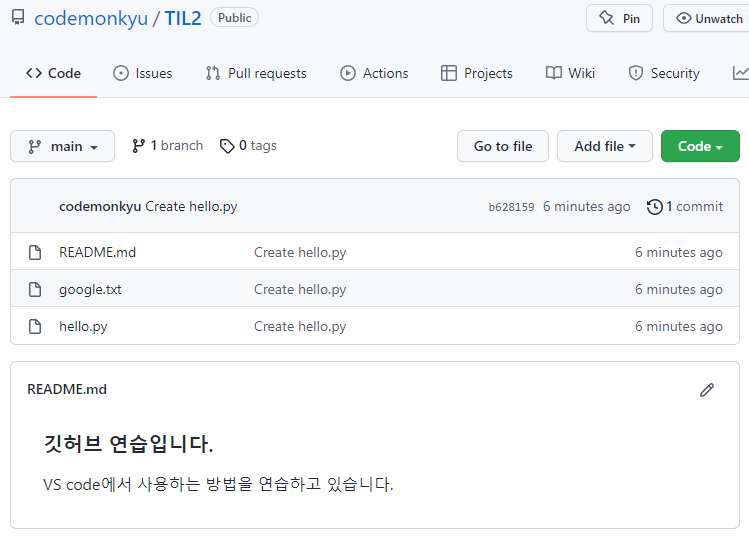
github으로 돌아가 해당 파일이 제대로 push 되었는지 확인한다.
간단한 git bash 명령어
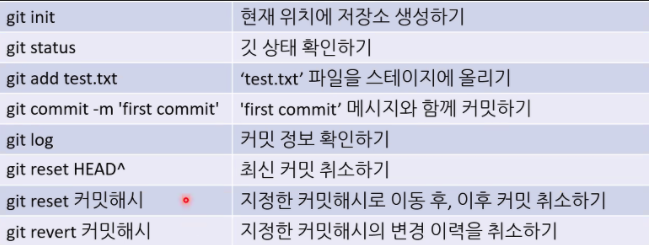

*github 사용이 아직까지는 익숙하지 않다!! 얼른 익숙해지기 위해 1일 1 커밋을 시작해야겠다.
*다음 포스팅에서는 브랜치에 대한 개념을 정리해보겠다.
댓글